2. DMA/Bridge for PCIe Drivers Overview
2.1. The PCIe DMA Driver
The Xilinx PCI Express DMA IP provides high-performance direct memory access (DMA) via PCI Express. The PCIe DMA can be implemented in Xilinx 7-series XT and UltraScale devices. Xilinx Support Answer 65444 provides drivers and software that can be run on a PCI Express root port host PC to interact with the DMA endpoint IP via PCI Express. The drivers and software provided with the answer recordare designed for Linux and Windows operating systems and can be used for lab testing or as a reference for driver and software development. Through the use of the PCIe DMA IP and the associated drivers and software you will be able to generate high-throughput PCIe memory transactions between a host PC and a Xilinx FPGA.
2.2. Accessing and Building the Xilinx Driver
These steps are derived from Xilinx Support Answer 65444, with our suggestions added.
The current driver implementation uses the following Kernel functions and must be included in your OS kernel version. The following Linux distributions have been tested:
Red Hat (RHEL 7)
Fedora
CentOS
Ubuntu
Navigate to Xilinx’s GitHub repo here and clone the repo from either the Linux CLI or by downloading the repo directly from the GitHub website. A helpful website is DownGit, which will allow you to download the XDMA folder without pulling the entire repository.
On your host computer, make a temporary directory using mkdir dma_driver and navigate to this directory.
Copy the downloaded zip file to the current directory with cp ../Downloads/linux-kernel.zip . (do not forget the period),
and unzip the driver zip file. Navigating into linux-kernel, we can open the README to find out how to
install the driver. Be aware that the Usage instructions are not exact and there are some additional steps required in between.
During our testing, after attempting to run the Makefile by using sudo make install in the xdma folder,
we found a few errors while compiling. These errors may be fixed in the future, but as of the current XDMA driver version of
v2020.1.8, these may prevent you from properly creating the driver:
Make sure you install the dependencies
kernel-develandelfutils-libelf-devel.
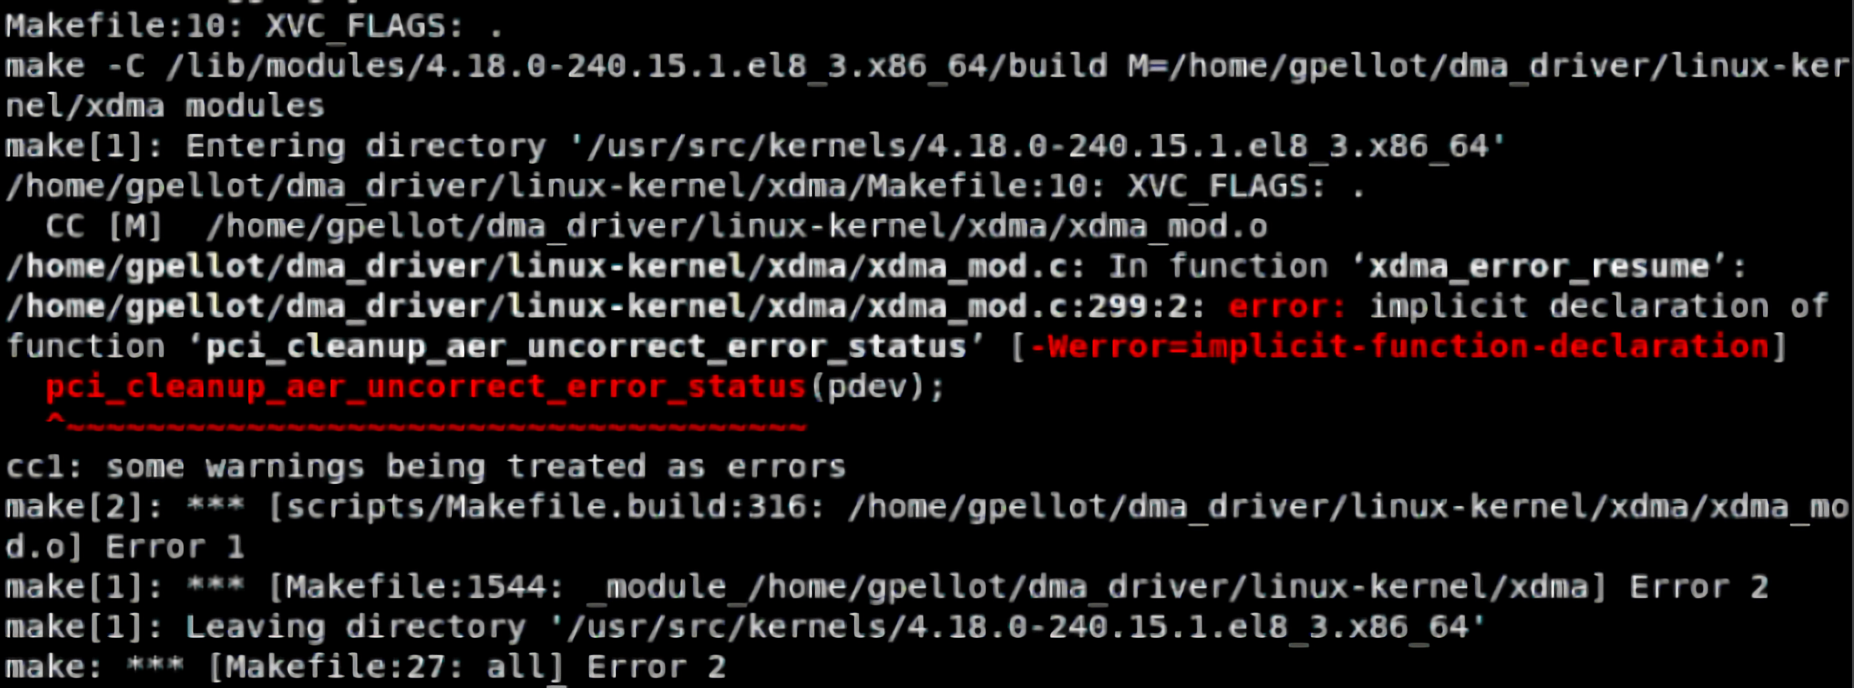
Possible Makefile error
If you encounter this error (implicit declaration of function
pci_cleanup_aer_uncorrect_error_status), openxdma_mod.cin your editor of choice and replacepci_cleanup_aer_uncorrect_error_status(pdev)forpci_aer_clear_nonfatal_status(pdev). Save the file.There are other errors present in
libxdma.candxmda_mod.c. These files can be updated from this pull request here.
Once all errors have been fixed (there may be more or less depending on the version, check the Github repo), make the driver with
sudo make install and run sudo make in the tools folder. Load the driver by navigating to the tests folder,
making the tests executables (we opted to test load_driver with chmod +x 'load_driver.sh') and running sudo ./load_driver.sh.
Check that the driver is loaded into the kernel with lsmod.
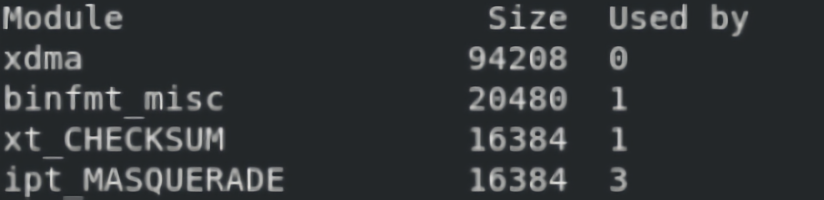
Checking the kernel modules
We can test the driver using the same process by running sudo ./run_test.sh. When we ran the test, we encountered an error on line 28.
To fix this, open the run_test.sh file, and on line 28, change if [ $channelId == "1fc" ]; then to if [ “$channelId” == "1fc" ]; then.
From here, you will be able to connect your physical PCIe device to the host machine and run each test to check that the host can identify the PCIe Endpoint.
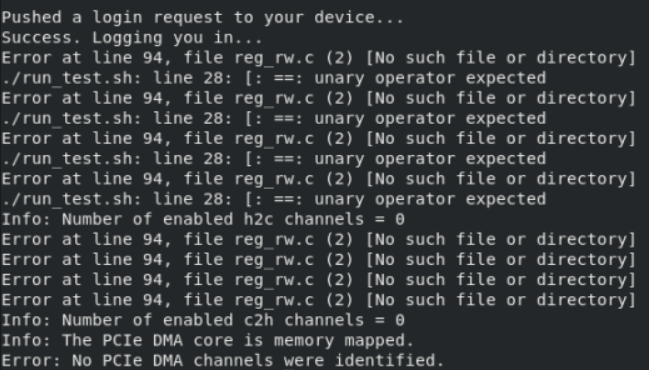
Error in run_test.sh